
Quick Start
Just got the asset? Newbie? Get started quickly.
Status and Prerequisites
First of all, make sure that the requirements are met.
Built-in
URP
HDRP
Windows
MacOS
Linux
WebGL
iOS
Android
Unity 6
Unity 2023.x
Unity 2022.x
Unity 2021.x
Unity 2020.3
Unity 2020.2 and below
Input System (New)
Input Manager (Old)
Import Input System
Dark UI requires the new input system package to be installed. Make sure to import ‘Input System’ first.

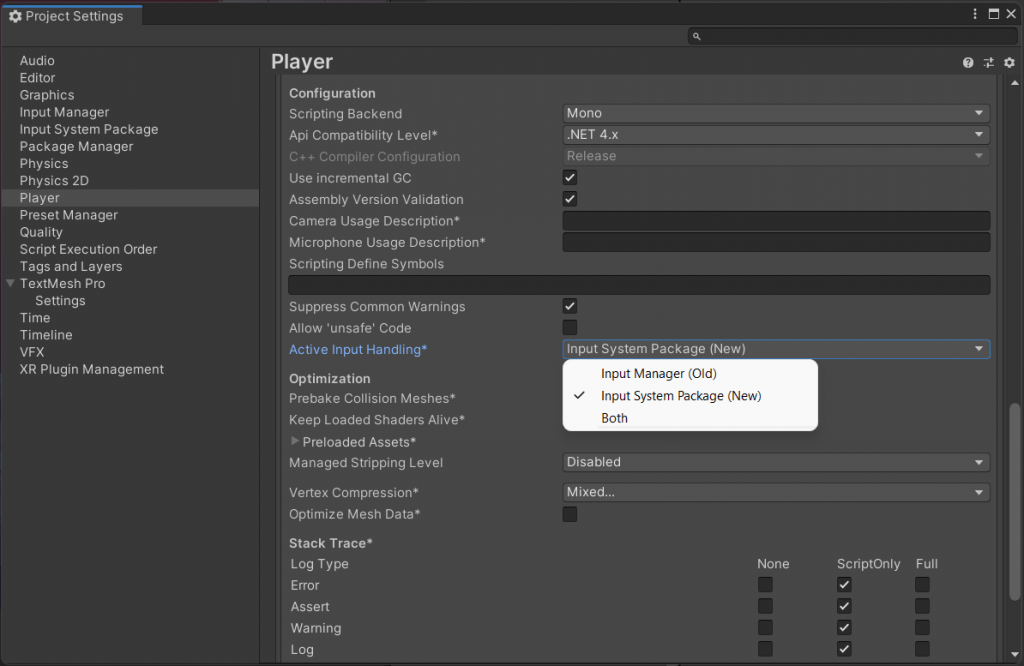
After importing the package, make sure to change the active input handling to ‘Input System’ or ‘Both’ in player settings.
Choosing the right scene
There are 8 demo scenes in total in Dark UI. Each scene is set to be used for different purposes. If you’re using URP or HDRP in your project, make sure to use the ones in that specific folder.
Cross Platform scenes are meant to be used in standalone platforms (such as Windows and MacOS), allowing simultaneous gamepad and mouse inputs. If your game supports both gamepad and mouse inputs and you are targeting standalone platforms then you can use this scene.
Desktop scenes are meant to be used in standalone platforms (such as Windows and MacOS), allowing mouse inputs. If you don’t need gamepad support and you are targeting standalone platforms then you can use this scene. It is better to use this scene if there’s no gamepad support in your game.
Console scenes are meant to be used in next gen consoles (such as Xbox), allowing gamepad inputs. If you’re targeting console platforms then you can use this scene.
Mobile scenes are meant to be used in mobile platforms (such as iOS and Android), allowing touch inputs. If you’re targeting mobile platforms then you can use this scene.
UI Manager
Do you want to change the appearance of the entire UI at the same time? Well, we got you covered. UI Manager will basically change every single element, meaning that you won’t have to change stuff one by one.
You can open the window by clicking Tools > Dark UI > Show UI Manager. That’s it, you’re all set! You can now expand the categories and start changing values.
Update Values
With this option checked, UI Manager will dynamically update UI elements. If not, you won’t see any changes until you hit play (runtime). You can turn this off for more performance in the editor, just remember to enable it when modifying items. This feature is disabled in build mode, so it won’t have any effect on builds.
Extended Color Picker
If you want to see a more detailed color picker, enable this. This will be adding a hex code and an alpha slider right next to the color picker.
UI Manager Hints
If you want to see some tips about the manager, then you can enable this.
Keep in mind that UI Manager values are universal and will affect all objects containing any UI Manager component.

How can we help?
A premium WordPress theme with an integrated Knowledge Base,
providing 24/7 community-based support.